

Key Takeaways
- Check your airline's personal item size limits before choosing or packing your bag.
- Organize items by access frequency - things you need mid-flight go on top.
- Liquids, electronics, and medications should always stay in your personal item, never checked.
- A consistent packing system reduces stress across different trip types and airlines.
- Overpacking a personal item is a common mistake that slows you down at security.
What you will need
Why Your Personal Item Deserves More Thought
Most travelers treat their personal item as an afterthought - a place to stuff whatever didn't fit in the carry-on. But for short trips and budget flights where a carry-on may cost extra, your personal item might be the only bag you bring. Even when you have a carry-on, your personal item is what stays with you throughout the flight, meaning how it's packed directly affects your comfort and stress level from boarding to landing.
A well-chosen, well-packed personal item means no scrambling at security, no digging past a laptop to find your headphones, and no anxiety about whether your bag will fit. It also supports smarter overall trip planning - decisions you'll find addressed in our trip planning hub.
Size Rules Vary - Always Verify First
Airlines set their own personal item size limits, and those limits are not standardized. A bag that fits under one carrier's seat may be rejected at the gate by another. Always look up the specific airline's personal item dimensions on their official website before you travel, especially on budget carriers, which tend to enforce limits more strictly.
The steps below work whether you're flying a major U.S. carrier or a low-cost airline, and whether your trip is a weekend getaway or a multi-week international journey.
What to Pack and How to Pack It
Before diving in, gather the tools and information you'll need:
What you will need
Structured personal item bag or daypack
A bag with multiple compartments makes it far easier to organize and access items during the flight.
Small zip pouches or packing cubes
Used to group similar items - liquids, cables, documents - so nothing gets lost in the main compartment.
TSA-compliant clear quart bag
Required for carrying liquids, gels, and aerosols through airport security checkpoints.
Luggage scale or measuring tape
Lets you confirm your bag's weight and dimensions match your airline's personal item policy before you leave home.
Now follow these steps to build a personal item that's organized, compliant, and genuinely useful in the air:
Confirm your airline's personal item dimensions
Before you pack a single item, look up the personal item policy for every airline on your itinerary - not just your primary carrier. Budget airlines and regional partners often have tighter restrictions. Measure your bag with a soft tape measure and compare it to the published limit. If you're close to the edge, choose a smaller bag or reconsider your packing list.
Decide what belongs in your personal item vs. carry-on
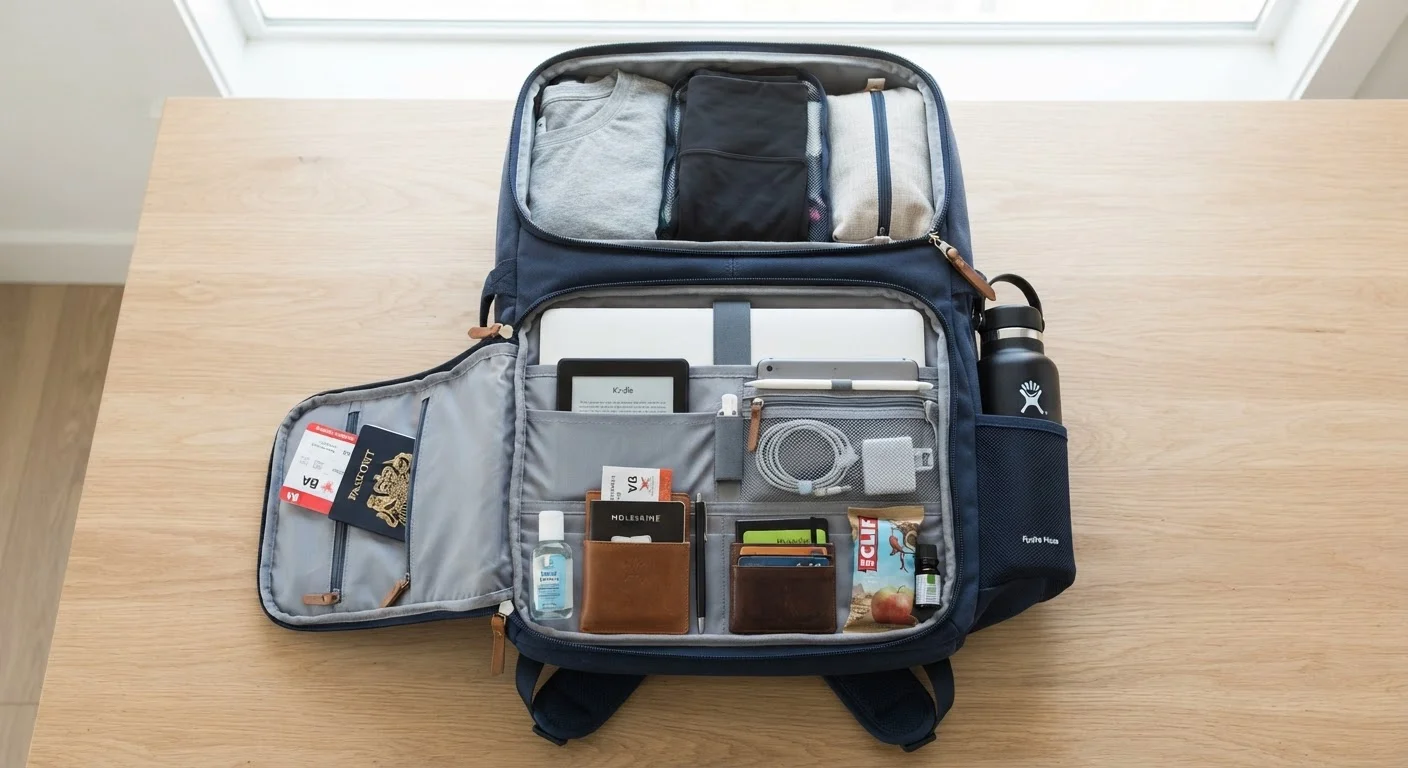
Your personal item should hold items you genuinely need during the flight or immediately upon landing: medications, travel documents, electronics, a change of clothes, and valuables. Everything else belongs in an overhead bin bag or checked luggage. If you're weighing whether to check a bag at all, the carry-on vs. checked bag trade-offs article can help you think it through.
Sort items into three access tiers
Think of your personal item in layers based on how often you'll need each thing:
- Top layer (frequent access): phone, earbuds, lip balm, gum, boarding pass
- Middle layer (occasional access): snacks, a small notebook, a jacket layer
- Bottom layer (rarely needed in-flight): charging cables, backup documents, an extra outfit
Pack in reverse order - bottom layer goes in first so top-layer items are immediately reachable without unpacking everything.
Pack liquids and electronics into dedicated pouches
Place all liquids in your clear TSA quart bag and keep it near the top so it's easy to remove at the security checkpoint. Group charging cables, adapters, and earbuds into a single electronics pouch. This prevents tangling and means you're not hunting through your entire bag at the gate or on the plane. For tips on avoiding slowdowns, see what causes airport security delays.
Do a final weight and fit check
Once packed, lift the bag with one hand to gauge comfort - you'll be carrying this through the airport. If it's straining your shoulder, remove non-essentials. Then physically confirm it fits under a standard airline seat by checking against a measured box if your airline provides one, or use the overhead dimensions as a reference. A bloated bag that doesn't fit under the seat creates boarding friction and may be gate-checked.
Use a Pouch System for Faster Security
Keeping electronics and liquids in clearly labeled, separate pouches means you can pull them out at the security checkpoint in seconds. This habit benefits all travelers around you and helps you avoid the repacking scramble that slows everyone down. See what actually causes security delays for more on this.
Once you've dialed in your personal item system, it becomes repeatable - you'll spend far less time packing for future trips. If you're planning a more complex itinerary, organizing a multi-city trip takes a structured approach to managing logistics across multiple destinations. And before you leave home entirely, run through the pre-departure checklist to make sure nothing critical is forgotten.
Keeping Your Bag - and Its Contents - Secure
A personal item that's easy to access is also easier for others to access. In busy airports and on crowded flights, basic habits go a long way. Keep your bag in front of you or between your feet in waiting areas. Avoid leaving it in an overhead bin if you're seated far from it. Use a bag with closeable zippers rather than open-top totes.
For a broader set of practical, low-anxiety habits around protecting your belongings during travel, keeping your belongings safe in unfamiliar places is worth a read before any trip. Security awareness doesn't have to mean paranoia - it mostly means having a consistent system.